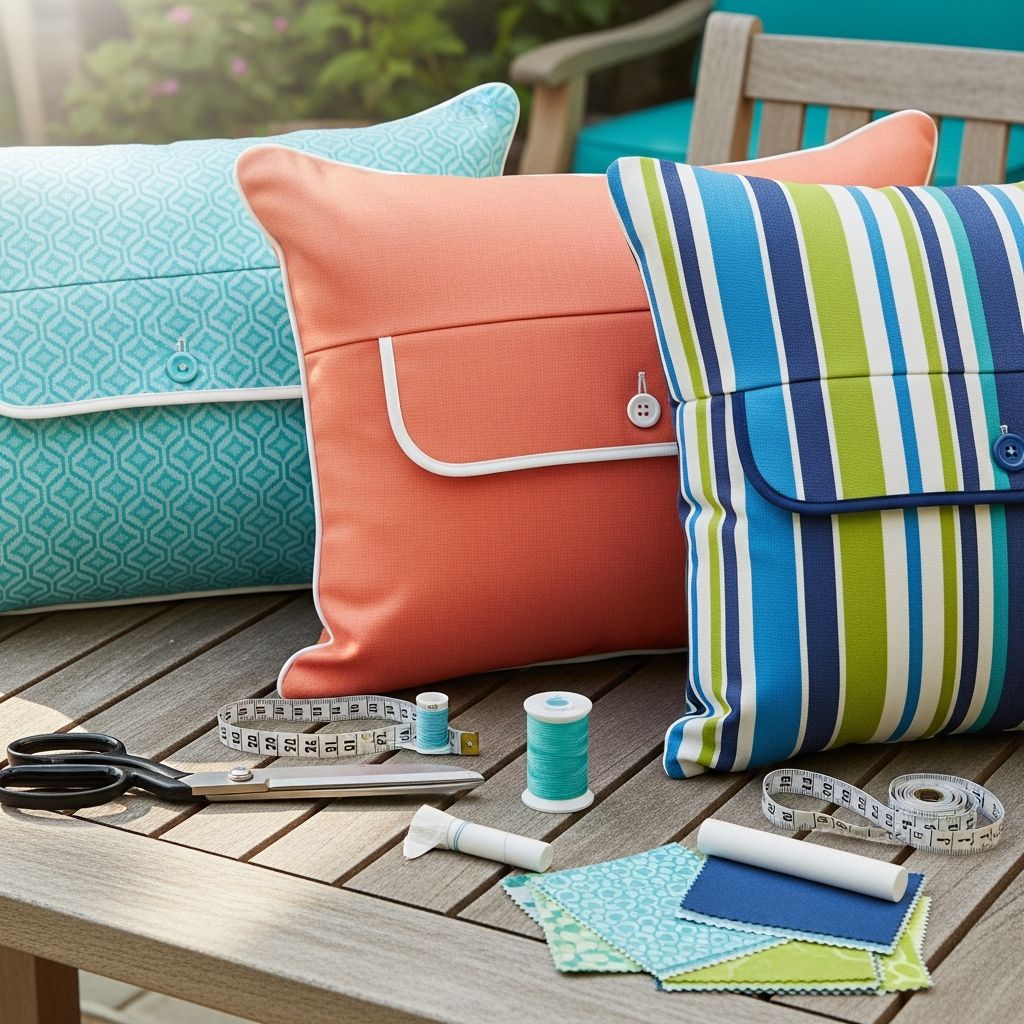
Three Creative Ways to Make Outdoor Pillows: A Complete DIY Envelope Pillow Guide
Brighten your patio with handmade outdoor pillows using three practical and creative DIY techniques.

Three Ways to Make Outdoor Pillows: A DIY Envelope Pillow Step-by-Step Guide
Outdoor pillows can instantly transform any patio, deck, or porch into a cozy retreat, adding a pop of color and comfort to your space. While store-bought versions are widely available, making your own outdoor pillows is not only cost-effective but also allows you to personalize your space with fabrics and patterns you love. In this guide, you’ll learn three practical methods for creating outdoor pillows, focusing on versatility, durability, and ease of assembly—with a detailed walkthrough for the envelope-style pillow cover.
Why Make Outdoor Pillows Yourself?
- Customization: Choose fabrics and colors that match your personal style.
- Cost-effectiveness: Repurpose materials or find discount fabrics to save money.
- Functionality: Incorporate waterproofing and easy-clean features that suit outdoor conditions.
1. Choosing the Right Materials for Outdoor Pillows
Selecting the correct materials is crucial to ensure your pillows withstand weather changes and stay vibrant over time. Consider the following components for your project:
- Outdoor Fabric: Designed to resist fading, repel water, and combat mildew. Look for solution-dyed acrylics, outdoor polyester, or heavy-duty twill.
- Standard Cotton or Canvas: If outdoor fabric isn’t available, pick a thick cotton or twill and apply a fabric waterproofing spray for additional protection.
- Pillow Insert Options:
- Outdoor-specific inserts (often polyester or foam) designed to resist moisture.
- Standard indoor inserts with protective coverings or DIY water barriers, such as encasing in garbage bags or heavy-duty plastic liners.
- Recycled plastic bags stuffed as the pillow filling for an extra-budget-friendly, weather-resistant option.
Tip: Always make your pillow cover 1″ smaller than your insert for a plump, tailored look.
2. Three Approaches to Outdoor Pillow Construction
Depending on your budget, available materials, and desired resistance to the elements, here are three effective approaches to stuffing and assembling your pillows:
| Method | Description | Pros | Cons |
|---|---|---|---|
| Plastic Bag Fill | Stuff the pillow cover with clean, unused plastic bags as filler. Shape and compress them to mimic a fluffy insert. | – Water-resistant – Reuses waste – No additional insert purchase | – Can be noisy – Less uniform shape |
| Indoor Insert with Waterproof Liner | Use a regular pillow insert encased in a waterproof garbage bag or liner before sliding into the pillow cover. | – Cost-effective – Reusable and removable – Easy to replace | – Must ensure a tight seal for water protection |
| Outdoor Pillow Insert | Purchase a purpose-made outdoor insert, typically made of quick-dry polyester or foam. | – Best for durability – Professional-quality feel – Designed for outside use | – Higher cost – May require specialty shopping |
Combine the above methods as needed based on your climate, budget, and sustainability goals.
3. How to Make an Envelope-Style Outdoor Pillow Cover (Step-by-Step Tutorial)
Tools and Supplies You’ll Need
- Outdoor or thick cotton/twill fabric (enough for chosen pillow size)
- Fabric scissors or rotary cutter
- Tape measure or quilting ruler
- Standard sewing machine and coordinating thread
- Straight pins or sewing clips
- Fabric waterproofing spray (optional but recommended for untreated materials)
- Iron and ironing board
- Pillow insert or stuffing
Preparation and Cutting
- Decide the final size of your pillow. For a snug fit, make the finished pillow cover 1″ smaller than the insert (e.g., for an 18″ x 18″ insert, make a 17″ x 17″ cover).
- For each pillow, cut one front piece to a square of your finished size plus seam allowance (e.g., 19″ x 19″ for an 18″ finished pillow to allow 1/2″ seams).
- Cut two back pieces as rectangles: same width as the front but half the height plus a 2″ overlap (e.g., two pieces of 19″ x 12″).
Hemming the Envelope Flap
- Take each back panel and fold over one long (widest) edge by 1/4″, then again by 1/4″ to hide the raw edge.
- Press the fold flat with an iron and pin in place.
- Sew close to the inner edge with a straight stitch to create a neat hem.
Assembling the Pillow Cover
- Lay the front piece right side up.
- Layer both back pieces right side down on top of the front, aligning outer edges and overlapping hems in the center. The hems should face inward.
- Pin thoroughly around all four edges.
Sewing the Pillowcase
- Using a 1/2″ seam allowance, sew around the entire outer edge of the pillow.
- Backstitch at the beginning and end for durability.
Finishing the Pillow
- Trim the corners diagonally without cutting the stitches to reduce bulk.
- Turn the pillowcase right side out through the envelope opening and use a chopstick or closed scissors to gently poke the corners into shape.
- Press if desired for crisp edges.
- Insert your pillow form or chosen filling through the back opening.
- If using untreated fabric, spray evenly with fabric waterproofing product, following the manufacturer’s instructions. Allow to dry fully before use.
4. How to Waterproof Your DIY Outdoor Pillows
Durability is essential for outdoor textiles. If you’re not using weatherproof fabric, it’s crucial to treat your finished pillows against moisture and stains:
- Fabric Waterproofing Spray: Readily available at craft and hardware stores, these sprays add a water-resistant barrier. Spray covers in a well-ventilated area and let them dry as indicated by the manufacturer.
- Protecting Pillow Inserts: Use a plastic or vinyl bag to seal regular inserts before enclosing in the pillowcase, preventing moisture absorption.
- Storage Tips: To maximize the lifespan of your pillows, store them in a dry place when not in use or during extended wet seasons.
5. Ideas for Customizing Your Outdoor Pillows
The best part of making your own outdoor cushions is the opportunity to get creative. Personalize your patio with designs and embellishments like:
- Handprinted Fabrics: Use fabric paint and simple tools like foam brushes to create geometric patterns, polka dots, or stripes. Allow paint to dry completely before sewing.
- Tassels and Trims: Stitch on handmade tassels or pom-poms at each corner for playful flair.
- Mix and Match Patterns: Coordinate different patterns and textures, such as solids, stripes, and botanicals, for visual interest.
- Embroidery Details: Add names, initials, or motifs to make pillows truly unique.
6. Care and Maintenance Tips for Outdoor Pillows
Proper care will ensure your cushions remain vibrant and functional throughout every season:
- Spot clean stains promptly with mild soap and water.
- Occasionally reapply waterproofing spray after washing or heavy weather exposure.
- Allow pillows to dry completely before storage to prevent mildew.
- Rotate and fluff pillows regularly to maintain shape and even wear.
Frequently Asked Questions (FAQs)
Q: What kind of fabric should I use for outdoor pillows?
A: Use fabric labeled for outdoor use such as solution-dyed acrylic or polyester. If unavailable, thick cotton or canvas can be waterproofed using appropriate sprays.
Q: Can I wash my DIY outdoor pillow covers?
A: Most covers made from outdoor fabric can be machine washed on a gentle cycle. Air dry to preserve waterproofing; otherwise, spray again after each wash.
Q: How do I make sure my pillow insert doesn’t get moldy?
A: Use inserts made for outdoor use, or encase traditional inserts in a waterproof liner. Always make sure pillows are dry before storing.
Q: What size should I cut my cover to fit my insert?
A: Cut your pillow cover 1 inch smaller than your insert for a tight, full fit. For an 18″ insert, sew a 17″ x 17″ finished cover.
Q: How long does it take to make one envelope-style outdoor pillow?
A: With pre-cut fabric and materials, a basic envelope pillow can be completed in under an hour, making it a quick project for afternoon crafting.
Inspiration & Final Touches for Your DIY Outdoor Pillows
Whether you opt for simple solids, bold patterns, or hand-painted designs, these pillows will bring new life to your outdoor seating. Don’t hesitate to get creative—add trims, experiment with color, and change out your covers seasonally for a fresh look. The envelope style makes this easy, as the covers slip on and off for quick updates and cleaning. Most importantly, enjoy the process and the comfort of lounging on your very own handcrafted outdoor cushions.
Author: Inspired by home crafting enthusiasts and makers. Photographs and step guidance adapted and rephrased for clarity per A Beautiful Mess outdoor DIY tutorials.
References
- https://abeautifulmess.com/three-ways-to-make-outdoor-pillows/
- https://www.youtube.com/watch?v=r5a4S5s2Gbk
- https://abeautifulmess.com/super-cute-quick-diy-porch-pillows/
- https://abeautifulmess.com/make-your-own-outdoor-cushions/
- https://threadloop.app/patterns/outdoor-pillows-3-ways-envelope-pillow-by-a-beautiful-mess
- https://abeautifulmess.com/tips-for-decorating-an-outdoor-living-space/
- https://sewing.craftgossip.com/tutorial-simple-outdoor-pillow-with-three-options-for-stuffing/
- https://abeautifulmess.com/category/outdoor-spaces/page/9/


