How to Make Mirrored Side Tables: A DIY Guide to Glamorous Decor
Elevate your living space with this step-by-step DIY mirrored side table tutorial featuring tips, tools, and styling ideas.
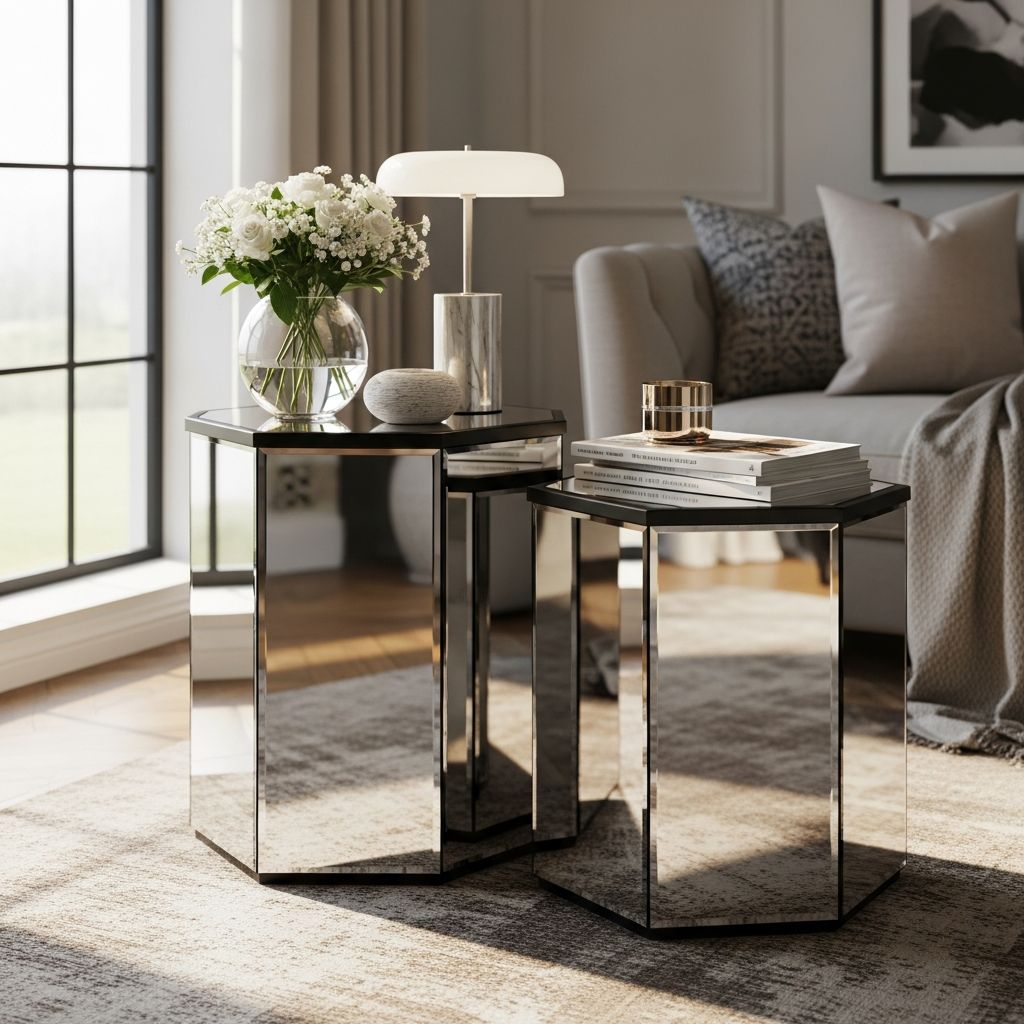
How to Make Mirrored Side Tables
Mirrored side tables add a touch of glamour and light-reflecting beauty to any room, creating a modern yet timeless accent. If you’ve admired the look of mirrored tables but balked at the price, you’ll be thrilled to know that making your own is entirely achievable. This detailed DIY guide will walk you through the step-by-step process of constructing custom mirrored side tables using plywood, custom-cut mirrors, glue, and simple hand tools. Whether you’re a seasoned DIYer or an enthusiastic beginner, you’ll discover how straightforward it is to craft furniture that’s both functional and stunning.
Why Choose Mirrored Side Tables?
Mirrored furniture has an alluring way of making spaces feel larger and lighter. Their reflective surfaces enhance any decor style, from Hollywood Regency to minimalist, and can act as statement pieces or subtle complements to existing furnishings. The contemporary chic of a mirrored table can:
- Reflect light, brightening darker corners of a room
- Add visual interest and a feeling of spaciousness
- Pair beautifully with metallics, glass, or natural wood
- Serve as versatile furniture—use them as end tables, nightstands, or accent pieces
While mirrored furniture often carries a premium price tag in retail stores, building your own allows you to control costs, customize dimensions, and personalize the finish for a one-of-a-kind result.
Tools and Materials You’ll Need
- Plywood sheets (recommend 3/4-inch for strength; quantity depends on your table size)
- Custom-cut mirrors (from local glass shop or pre-existing mirrors cut to size)
- Construction adhesive (for affixing mirrors to the plywood)
- Wood glue (for the main plywood assembly)
- Clamps (bar clamps or C-clamps to hold wood in place during drying)
- Drill (plus drill bits and countersink bit)
- Wood screws (#6 is recommended)
- Furniture glides or felt pads (to protect floors and provide stability)
- Finishing materials (optional—paint, stain, or sealant for the exposed wood edges)
- Measuring tape, square, and pencil
Optional: Beveled edge mirrors for a luxe finish, though this will increase cost. If you have unused mirrors or can repurpose material from previous renovation projects, bring these to a glass workshop for custom cuts to size.
Estimated Cost Breakdown
| Item | Estimated Cost (USD) |
|---|---|
| Plywood (one table) | $25–$40 |
| Custom-cut mirrors (without bevel) | $70 |
| Beveled edge mirrors (optional) | $130 |
| Construction adhesive and supplies | $15 |
| Hardware and glides | $10 |
| Total (per table, non-beveled) | $120–$135 |
| Total (per table, beveled) | $180–$195 |
Tip: The cost of mirrors is the biggest variable. Using standard flat edges is much more budget-friendly, while beveled mirrors deliver a refined look at a premium.
Step-by-Step Guide: Building Mirrored Side Tables
Step One: Prepare the Plywood Base
Measure and cut your plywood sheets to create five panels for each table—a top, a bottom, and four side panels. The dimensions will depend on your desired final size. Sand edges as needed for a smooth finish.
- Lay out the cut pieces to form an open-sided box (the bottom side will be open, and the mirrors will be attached to all visible faces).
- Use wood glue and clamps to join the pieces together. Allow the glue to set before moving on.
Step Two: Secure with Screws
After the glue has set, reinforce joints by pre-drilling holes and driving in screws. For a professional look and stability:
- Select a drill bit slightly narrower than your #6 screws.
- Use a countersink bit to ensure that screw heads sit flush with the surface, avoiding protrusions that could interfere with the mirrors.
- Space screws evenly along each joint.
Step Three: Add Furniture Glides
Flip the constructed box upside-down. On each corner of the base, hammer in furniture glides or adhesion felt pads. This will:
- Protect your floors from scratches
- Provide stability and ease of movement
Step Four: Attach the Mirrors
Flip your table right-side-up and prepare to add the mirror panels. Work on one surface at a time to ensure maximum adhesion.
- Apply a layer of construction adhesive to the plywood’s top. Use enough for a strong hold, but not so much that it creates a gap.
- Carefully position the mirror on the plywood, pressing down evenly and firmly. Hold in place for a few moments to get a solid bond.
- Allow the glue time to set as recommended by the adhesive instructions before handling further.
- Repeat for each visible plywood face (top and sides), allowing setting time between steps if working solo, to prevent mirrors from sliding.
Tip: Ensure mirrors are flush with edges for a seamless “boxed” effect. If you use beveled mirrors, they’ll naturally create a cavity-free join at the corners.
Step Five: Final Touches
Let the glue cure fully (check the product label, usually 24 hours). Wipe any excess glue from the edges before it dries. Once fully set:
- Clean mirrors with a gentle glass cleaner and non-scratch cloth.
- Style with books, candles, vases, or use as a chic plant pedestal.
- If desired, paint or finish any exposed plywood edges to complement your decor style.
Customization Options
This basic mirrored side table design is easily modified:
- Adjust dimensions to create a taller nightstand or a lower coffee table.
- Swap out plywood for MDF or other smooth, strong sheet materials.
- Add legs for mid-century flair or urban loft appeal.
- Incorporate mirrored tiles for a vintage mosaic effect.
- Spray paint exposed wood in black, gold, or silver for bold accents.
If you have basic woodworking skills, you can also experiment with building boxes featuring interior shelving for extra storage.
Mirrored Table Style Inspiration
Mirrored side tables are extremely versatile. Consider the following styling ideas:
- Modern: Minimalist lines with no visible hardware, paired with metallic accessories.
- Hollywood Regency: Pair with velvet seating, gold accents, and bold lighting.
- Art Deco: Use beveled mirrors, geometric decor, and dramatic color contrasts.
- Boho Chic: Layer with varied textiles and natural elements for an eclectic vibe.
- Small Spaces: Their reflective nature makes compact rooms feel more expansive.
Because mirrored tables capture and project light, try placing them near windows or lamps for maximum effect.
Caring for Your Mirrored Furniture
To keep your mirrored side tables looking pristine:
- Wipe surfaces regularly with a soft, lint-free cloth and gentle glass cleaner.
- Address spills promptly to prevent adhesive breakdown at mirror edges.
- Avoid harsh abrasives, which can scratch glass.
- Use drink coasters and soft pads beneath decor items to prevent scratches and chips.
Frequently Asked Questions (FAQs)
Q: What kind of adhesive should I use for mirrors?
A: Use a construction adhesive specifically formulated for mirrors and glass. Common wood glues don’t provide a strong or safe bond for glass, and generic adhesives may damage the mirror backing over time.
Q: Can I use reclaimed or old mirrors for this project?
A: Absolutely! If you have leftover mirrors from previous home updates or renovations, bring them to a glass company to have them cut to your needed dimensions, often at a lower cost than buying new mirrors.
Q: Will the screws scratch or crack the mirrors?
A: When assembled properly, screws are set into the plywood base and are fully covered by the adhesives and mirrors on the outside—no direct contact occurs. Always countersink screw heads for a flush finish.
Q: Is beveled glass necessary?
A: Beveled glass adds a high-end, polished look but is not essential for function. Flat mirror panels are equally reflective and considerably less expensive.
Q: How do I prevent fingerprints and streaks on the mirrors?
A: Handle mirrors with clean gloves during installation. After assembly, polish surfaces lightly with microfiber cloths and use streak-free glass cleaner formulated for mirrors.
Q: Can I add storage or shelves to my mirrored table?
A: Yes, with more advanced woodworking you can build open or closed shelving within the mirrored box, but be sure to account for extra weight and stability factors.
Additional Tips for Success
- Visit multiple glass shops to compare prices and ask about scrap or discount mirror remnants.
- Dry-fit all mirror pieces before final attaching to ensure a snug, seamless appearance.
- If making pairs, label plywood and mirror pieces for consistent assembly.
- Take your time with measuring and cutting for clean, geometric lines—mirrored surfaces highlight imperfections.
Conclusion
Mirrored side tables deliver an instant upgrade in style and light to any space. With plywood, affordable custom-cut mirrors, and a little do-it-yourself spirit, you can replicate a high-end look for a fraction of the cost. Whether you’re seeking understated elegance or bold glam, this DIY mirrored table project is a flexible platform for creative expression and practical enhancement of your decor. Gather your tools, embrace the process, and enjoy a handmade furniture piece that will dazzle guests and brighten your home for years to come.
References
- https://www.youtube.com/watch?v=t4bN_VE3RqQ
- https://www.youtube.com/watch?v=70G0drsvGKc
- https://www.youtube.com/watch?v=lBa8Muuvjoo
- https://abeautifulmess.com/how-to-make-mirrored-side-tables/
- https://abeautifulmess.com/copper-pipe-side-table-diy/
- https://abeautifulmess.com/category/diy/home-decor/small-spaces/
- https://abeautifulmess.com/category/diy/page/32/
- https://abeautifulmess.com/category/diy/home-decor/living-room/page/4/


