How to Make Cake Pops: Easy Recipe & Decorating Guide
Master the art of making beautiful, delicious cake pops at home with our complete step-by-step guide.
How to Make Cake Pops: A Complete Guide to Homemade Perfection
Cake pops have become a beloved dessert choice for parties, celebrations, and everyday indulgence. These bite-sized treats combine the comfort of cake with the fun of a lollipop, making them irresistible to both children and adults. If you’ve ever wondered how to make café-quality cake pops at home, you’re in for a treat. This comprehensive guide will walk you through every step of the process, from mixing your first batch of batter to adding the final decorative flourish. With simple ingredients, easy-to-follow instructions, and helpful tips from experienced bakers, you’ll be creating professional-looking cake pops that will impress everyone at your next gathering.
What Are Cake Pops?
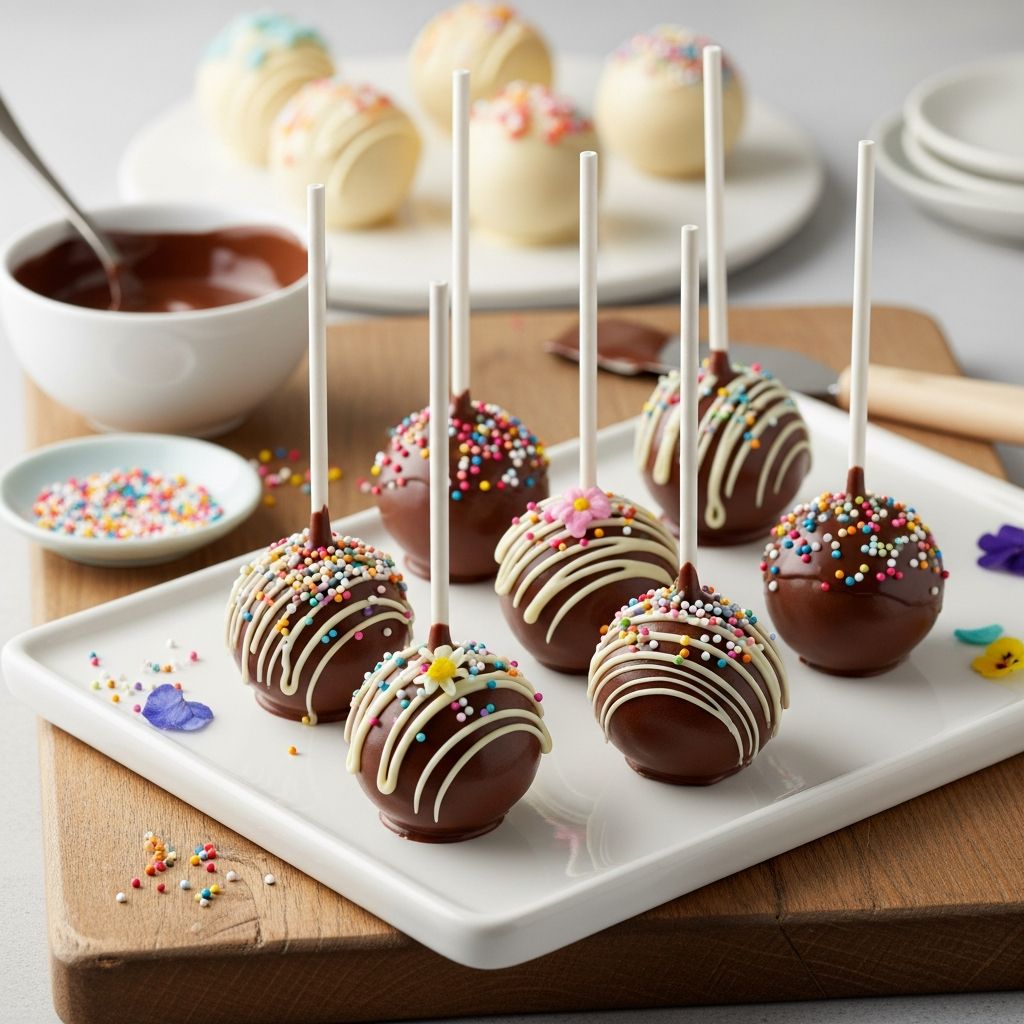
Cake pops are a creative twist on traditional cake. They consist of crumbled cake mixed with frosting, rolled into small balls, inserted onto lollipop sticks, and coated with a smooth candy shell. The result is a perfectly portioned, elegant dessert that’s easy to hold and eat. These versatile treats can be customized with different cake flavors, frosting varieties, and decorative toppings to suit any occasion or personal preference.
Essential Ingredients for Perfect Cake Pops
Making delicious cake pops requires just a handful of quality ingredients. Understanding each component will help you achieve the best results.
Vanilla Cake
The foundation of any great cake pop is excellent cake. You can use a convenient box cake mix for simplicity and consistency, or bake a homemade vanilla cake from scratch if you prefer. If you have leftover cake from another project, this is the perfect way to use it up. Box cake mixes are reliable and offer consistent results, making them an ideal choice for beginners. However, homemade cakes add superior flavor and texture that truly elevate your final product.
Frosting
Frosting binds the crumbled cake together and adds moisture and sweetness to each pop. You can choose between homemade vanilla frosting for superior flavor or store-bought varieties for convenience. Many bakers prefer homemade frosting made with butter, powdered sugar, and vanilla extract, but quality store-bought options work wonderfully too. Consider experimenting with different frosting flavors like chocolate, cream cheese, or salted caramel to create unique flavor combinations.
Candy Melts or Chocolate Wafers
These create the signature candy coating that makes cake pops so visually appealing and delicious. Candy melts are specifically formulated for dipping and decorating, and they set quickly with a professional appearance. Unlike tempering traditional chocolate, candy melts require no special techniques and won’t scorch easily. They come in various colors including white, milk chocolate, dark chocolate, and pastel shades, offering endless decorating possibilities.
Sprinkles and Decorations
Sprinkles add color, texture, and personality to your cake pops. You can purchase them from any bakery supply store or make your own homemade sprinkles for a personal touch. Consider using pearl nonpareils, edible glitter, mini chocolate chips, crushed candy, or even finely chopped nuts for creative embellishments.
Equipment You’ll Need
Having the right tools makes the cake pop creation process smoother and more enjoyable. While you don’t need specialized equipment, certain items will significantly improve your results.
Baking Essentials
You’ll need a standard cake pan (9×13 inches works well), mixing bowls, and measuring cups. A hand mixer or stand mixer helps combine ingredients quickly, though mixing by hand is perfectly acceptable.
Rolling and Shaping Tools
A cookie scoop or meatballer helps create uniform cake balls. These tools ensure consistent sizing, which means your cake pops cook and coat evenly. If you don’t have these items, you can roll balls by hand, though it requires more patience.
Dipping and Finishing Supplies
Lollipop sticks in various sizes are essential for your cake pops. A tall glass or 2-cup measuring cup serves as the perfect vessel for your melted coating. A Styrofoam block holds your finished cake pops upright while they set. Parchment or wax paper lines your baking sheet during the chilling phase.
Step-by-Step Instructions
Making the Cake Mixture
Start by preheating your oven to 350°F and greasing a 9×13-inch cake pan with baking spray. Prepare your cake according to package directions, combining the cake mix, water, oil, and eggs in a large bowl. Whisk until well combined, then pour into your prepared pan. Bake according to package instructions and allow to cool completely. This step is crucial—a warm cake will create a too-moist mixture that’s difficult to work with.
Once cooled, crumble the entire cake into a large bowl using your hands or a fork. Add your frosting gradually, stirring with a wooden spoon or using a hand mixer on low speed. The goal is a crumbly mixture resembling wet sand, not a pasty dough. This texture is essential for rolling into balls. If you overmix, your cake pops will be dense and heavy. If you undermix, they’ll fall apart.
Rolling and Chilling
Using a cookie scoop or your hands, roll the cake mixture into 1-inch balls, about 1 tablespoon each. Place these balls on a lined baking sheet, and don’t worry if they touch each other slightly. Cover and refrigerate for at least 4 hours, or freeze for a minimum of 30 minutes. This chilling time is non-negotiable—it ensures your coating sets properly and prevents cake balls from sliding off the stick.
Melting and Coating
Melt your candy melts or chocolate wafers according to package instructions. Pour the melted coating into a tall glass or 2-cup measuring cup for easy dipping. Remove only a few cake balls from the refrigerator at a time, keeping the remainder chilled as you work. Dip the tip of a lollipop stick into the melted coating, then insert it about halfway into a cake ball. Gently dip the entire cake ball into the coating, ensuring complete coverage including where the stick meets the cake. Tap gently on the side of the cup to remove excess coating.
Decorating and Setting
While the coating is still wet, add sprinkles or other decorations immediately. Place your decorated cake pop upright in a cake pop holder or Styrofoam block to set. Allow 30 minutes to 1 hour for the coating to harden completely. Rewarm your coating as needed while you continue with the remaining cake pops.
Pro Tips for Perfect Results
Temperature Control
Keeping your cake balls cold is the secret to success. Cold cake balls allow the coating to set quickly and prevent them from sliding off the stick. If your cake balls seem to be warming up, return them to the freezer for a few minutes before continuing.
Coating Consistency
Your melted coating should be smooth and pourable. If it becomes too thick, add a small amount of shortening or vegetable oil, not water. Avoid overheating, which can cause the coating to become grainy or thick. Follow package instructions carefully and use low heat.
Preventing Cracks
Cracking typically occurs when there’s too much temperature fluctuation. Avoid moving cake pops between extreme temperatures too quickly. Let them acclimate gradually, and ensure your coating isn’t too hot when dipping.
Creating Smooth Coatings
For a perfectly smooth finish, ensure your cake balls are completely chilled and your coating is the right temperature—warm enough to be pourable but not so hot it slides off. Dip slowly and smoothly, rotating to ensure even coverage. Tap off excess coating carefully to avoid drips.
Flavor Variations and Ideas
Chocolate Cake Pops
Substitute chocolate cake mix and pair with chocolate frosting. Coat with milk or dark chocolate candy melts for a classic combination.
Red Velvet Cake Pops
Use red velvet cake mix with cream cheese frosting. These create a stunning visual effect when coated with white candy melts and decorated with red sprinkles.
Confetti Cake Pops
Prepare confetti or funfetti cake mix and use colorful sprinkles throughout the mixture and as a topping. These are perfect for birthday celebrations.
No-Bake Options
For a no-bake version, crush store-bought cookies or brownies, mix with frosting, and follow the same rolling and coating process. This shortcut is perfect for quick projects or when you’re short on time.
Storage and Make-Ahead Tips
Short-Term Storage
Store finished cake pops in an airtight container at room temperature for up to 5 days. They’ll maintain their quality and taste best when consumed within this window.
Long-Term Storage
Refrigerate cake pops for up to 2 weeks in an airtight container, or freeze undecorated cake balls for up to 3 months. To use frozen cake balls, thaw in the refrigerator and then proceed with coating and decorating.
Making Ahead
You can prepare cake pops several days in advance, making them perfect for party planning. Prepare the cake and frosting mixture up to 3 days ahead. Roll into balls and refrigerate. Coat and decorate the day before serving for optimal freshness and appearance.
Troubleshooting Common Issues
Cake Balls Sliding Off the Stick
Ensure your cake balls are properly chilled before dipping. Warm cake balls don’t hold the stick securely. Also, make sure the coating is at the right temperature—not too hot.
Coating Won’t Set
Your coating may be too warm or the cake balls too warm. Allow both to cool properly. If the coating is too thin, add more candy melts. If too thick, add a small amount of shortening.
Lumpy or Grainy Coating
This typically results from overheating. Use low heat and stir frequently. Avoid getting water into your coating, which will cause graininess.
Cake Mixture Too Wet
You’ve added too much frosting. The texture should resemble wet sand. Add more crumbled cake to balance the mixture. Remember, you can always add more frosting, but it’s harder to remove excess.
Using Cake Pops for Special Occasions
Cake pops make excellent gifts and party favors. Package them in clear cellophane bags tied with ribbon for elegant gifting. They’re perfect for weddings, birthdays, baby showers, corporate events, and holiday celebrations. Create themed designs by matching your coating colors and decorations to your event’s color scheme. Personalize with initials or numbers using edible markers for an extra special touch.
Frequently Asked Questions
Q: Can I make cake pops with any type of cake?
A: Absolutely! While vanilla is classic, you can use any cake flavor you enjoy. Chocolate, red velvet, funfetti, lemon, or even doctored box mixes work wonderfully. Experiment to find your favorite combination.
Q: What’s the best frosting to use?
A: Any frosting works, but buttercream is ideal because it holds the cake mixture together well. Cream cheese frosting adds interesting flavor. Use about 1 cup frosting per box cake mix as a guideline.
Q: Can I use regular chocolate instead of candy melts?
A: Yes, but real chocolate requires tempering to set properly. Candy melts are easier for beginners because they don’t require tempering and set more reliably.
Q: How far in advance can I make cake pops?
A: Prepare cake pops up to 5 days in advance for best results. Store in an airtight container at room temperature. You can freeze undecorated cake balls for up to 3 months.
Q: Why do my cake pops look dull instead of shiny?
A: Dull coating usually means the candy melts weren’t melted properly or the temperature dropped too much. Ensure smooth, consistent melting and maintain appropriate coating temperature throughout the dipping process.
Q: Can children help make cake pops?
A: Yes! Cake pops are perfect for a fun baking project with kids. Older children can help mix ingredients and roll balls. Adults should handle the hot melted coating and dipping process for safety.
Q: What’s the difference between cake pops and cake balls?
A: Cake balls are the coated mixture without sticks, while cake pops have lollipop sticks inserted. Both taste identical; the stick simply makes them easier to hold and eat.
Conclusion
Making homemade cake pops is easier than you might think, yet the results look impressively professional. With quality ingredients, careful attention to temperature and timing, and a bit of practice, you’ll master this delightful dessert. Whether you’re creating these treats for a special occasion, as gifts for loved ones, or simply as a fun weekend project, cake pops offer endless possibilities for creativity and personalization. Start with our basic recipe, experiment with different flavors and decorations, and soon you’ll be making café-quality cake pops that will have everyone asking for your secret recipe. Happy baking!

