How to Make a Bolster Pillow: A Complete DIY Sewing Tutorial
Transform your space with a custom bolster pillow—learn all the essential steps, techniques, and creative ideas for a stylish finish.
How to Make a Bolster Pillow: Step-by-Step Sewing Tutorial
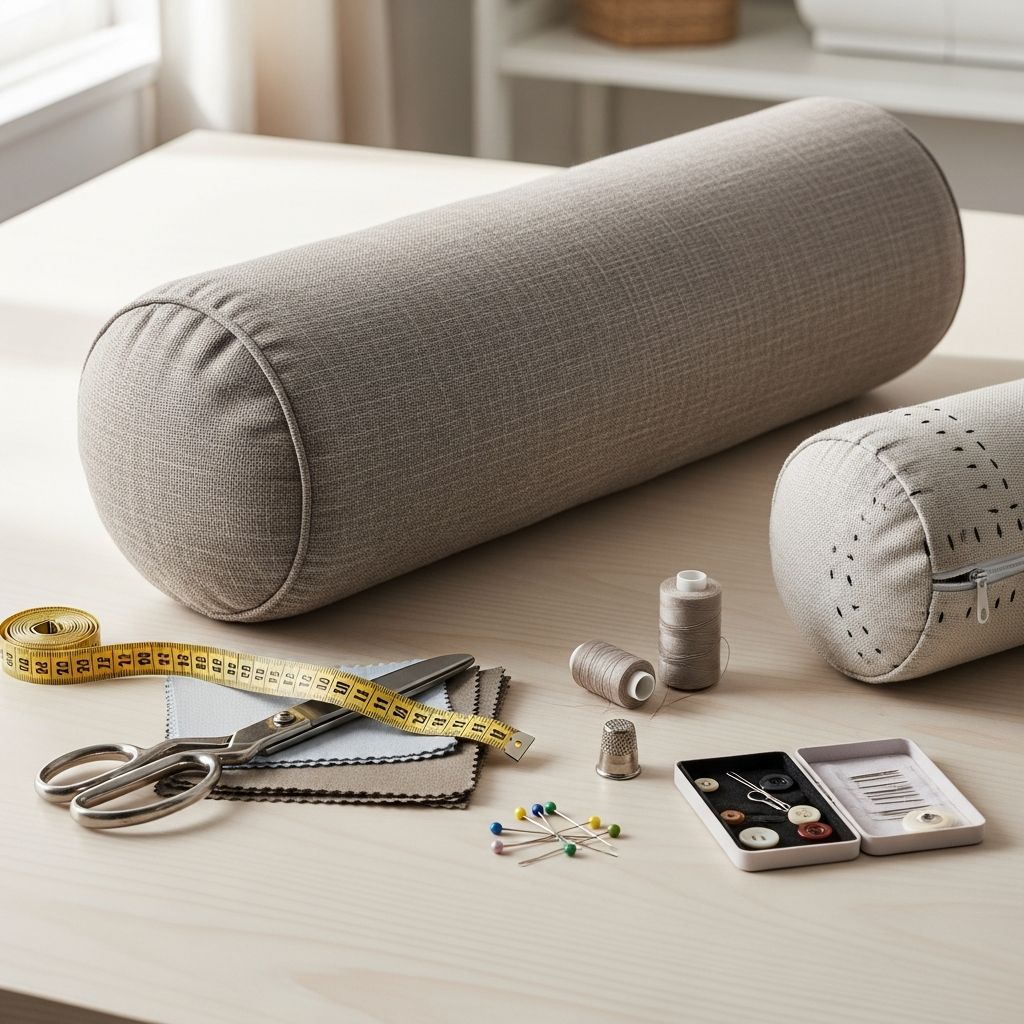
Bolster pillows are stylish and functional accents that can enhance any living space, whether on a sofa, bed, or lounge chair. Unlike standard cushions, their cylindrical shape provides ergonomic support while adding visual interest. This detailed tutorial will walk you through every step of creating your own custom bolster pillow—from deciding dimensions and cutting fabric to sewing, finishing techniques, and embellishment ideas. Even if you’re a beginner with basic sewing skills, you’ll find clear instructions and pro tips for the perfect result!
Table of Contents
- Supplies & Tools Needed
- Planning Your Bolster Pillow
- Cutting the Fabric & Measuring
- Sewing the Body
- Adding Piping to Ends
- Making Circular Ends
- Closure Options: Zipper, Velcro, or Tufted Ends
- Tufted Ends & Covered Buttons
- Decorative Trims & Embellishments
- Finishing Touches & Inserting the Filling
- Frequently Asked Questions (FAQs)
Supplies & Tools Needed
- Main upholstery fabric (cotton, velour, velvet, linen, or blend)
- Contrasting or matching piping (premade or handmade)
- Cushion filling (polyester fiberfill, batting, or pre-made pillow insert)
- Zipper or Velcro (for closure options)
- Sewing machine and zipper/piping foot
- Sharp fabric scissors
- Measuring tape
- Pins, clips, and sewing needles
- Upholstery or embroidery thread (for tufting/buttons)
- Covered buttons (optional, for tufted ends)
- Ribbons, fringe trim, or decorative accents (optional)
- Iron (for pressing seams)
Planning Your Bolster Pillow
Start by deciding the size and style for your bolster pillow. Common dimensions are:
- Diameter: 6, 10, or 12 inches
- Length: 20-30 inches (or longer for specialty uses)
Consider where you’ll use the pillow and what fabrics complement your decor. Velour, velvet, and heavy cotton provide structure and luxury, while linen or blends offer a casual touch. Choose piping and trims as accents—metallic, patterned, or contrasting colors elevate the look.
Cutting the Fabric & Measuring
Precise cutting is crucial for a snug, polished finish. Here’s how to measure and cut:
- Measure the circumference of the bolster (wrap measuring tape around the tube) and add 1 inch for seam allowance.
- Cut the main body piece to this measurement in width and the desired pillow length plus 1 inch for seams.
- Calculate circles for ends: Use diameter + 1 inch seam allowance. Cut two matching circles from your fabric.
- Main body: 8 inches x 20 inches (diameter + 1″ and length + 1″)
- End circles: Two pieces, 8 inches in diameter
For piping, cut lengths equal to the circumference of the circles (plus a couple extra inches for overlap).
Sewing the Body of the Pillow
With your fabric pieces cut, begin assembling the bolster:
- Place the main rectangular piece with right sides facing and sew the long edge into a tube using half-inch seam allowance.
- Press seams open with an iron for a crisp finish.
- If adding a zipper or velcro: Align and pin closure along one long edge, sew in place, and topstitch for durability.
- Ensure all raw edges are tucked or finished to prevent fraying.
Adding Piping to Ends
Piping is a signature decorative detail on bolster pillows. You can use pre-made piping or create your own:
- Lay piping along the edge of each end circle, aligning raw edges with fabric.
- Pin or clip piping into place—leave extra length for overlap and curve adjustments.
- Using a zipper or piping foot, sew piping to each circular end piece, going slowly around the edge for precision.
- Trim cord ends neatly; overlap ends and tuck under for a seamless appearance.
Making Circular Ends
Bolster ends can be flat, tufted, or gathered for different looks. Here’s the process for standard flat ends:
- Divide both circular ends and openings into quarters—mark with pins—so alignment is easier.
- With the tube turned inside out, pin each circle to a tube opening (right sides together) matching the marks.
- Stitch each circle onto the tube, sewing directly over existing piping seam for clean edges.
- Turn the pillowcase right-side out.
Closure Options: Zipper, Velcro, or Tufted Ends
Depending on preference and expertise, you can choose between several closure methods:
| Closure Type | Difficulty | Suitable For | Description |
|---|---|---|---|
| Zipper | Intermediate | Removable covers, regular use | Sew an invisible or standard zipper along body seam or circular end for easy removal. |
| Velcro | Easy | Quick projects, easy closure | Attach Velcro strips to end seams; sew flat and strong—good for casual decor. |
| Tufted Gathered Ends | Advanced | Permanent covers, decorative look | Gather each end and secure with running stitches and covered buttons for classic finish. |
Tufted Ends & Covered Buttons
Tufted ends create a timeless, plush style often used for accent bolsters:
- With the pillow form inside, use upholstery thread to run a stitch through the center of each end.
- Poke the threaded needle through one circular end and out the other; pull tight to gather and create a tufted effect.
- Add fabric-covered buttons to each end for an elegant finish. Tie off thread securely using a slip knot or triple knot, then trim excess.
- If desired, use embroidery or contrast thread for extra style.
Decorative Trims & Embellishments
Embellishments personalize your bolster. Here are creative trim options:
- Fringe trim: Sew a fringed ribbon 3 cm from each edge, wrapping fully around the circular ends.
- Layered ribbons: Add extra ribbons, piping, or metallic accent trim spaced 0.75 cm apart for a luxe look.
- Embroidery: Use decorative stitch lines or contrasting thread colors on seams or along piping.
- Fabric paint & patches: Apply custom designs or patches for eclectic decor styles.
Overlap trim ends at seams for a polished, professional finish.
Finishing Touches & Inserting the Filling
Once sewing and embellishments are complete:
- Turn the pillow cover right side out.
- Insert the inner pillow or stuffing. Adjust to ensure a snug, central fit.
- Close using zipper, Velcro, or secure tufted ends as chosen.
Give your completed bolster pillow a final press and fluff. Place it in your chosen spot—bedroom, living area, or reading nook—and admire your handiwork!
Frequently Asked Questions (FAQs)
Q: What is the best fabric for a DIY bolster pillow?
A: Durable upholstery fabric such as cotton, velour, velvet or linen works best for shape and longevity. Avoid thin materials to maintain structure.
Q: Can I make a bolster pillow without sewing piping?
A: Yes. While piping adds professionalism and style, you can omit it for a simpler, quick project.
Q: How do I choose pillow size for my space?
A: Measure the area where the pillow will be placed. A 6–12 inch diameter and 20–30 inch length fit most sofas or beds; opt for longer bolsters for king-size beds or deep seating.
Q: Is tufting with covered buttons difficult?
A: Some sewing experience helps, but following each step—using strong upholstery thread, a long needle, and firm knots—ensures a secure, beautiful tufted finish.
Q: Which pillow filling works best?
A: Polyester fiberfill is inexpensive and holds shape, while foam or pre-made inserts offer extra support. Use what matches your comfort needs.
Pro Tips for Bolster Pillow Success
- Always pre-wash and iron fabric before cutting—this prevents shrinkage and sets a professional tone.
- Use a piping foot or zipper foot for even, secure sewing around curved edges.
- Test sewing settings on scrap fabric before assembling final pieces, especially when adding piping or zippers.
- Embellishments: Try experimenting with different trims and colors for unique, cohesive designs.
Creative Ideas & Variations
- Mixed fabrics: Combine velvet and linen for contrast.
- Pattern play: Use bold prints or geometrics for modern appeal.
- Boho trims: Add tassels, pom-poms, or hand-stitched motifs.
- Space-saving bolsters: Make narrow cylindrical pillows for kids’ rooms or reading corners.
Conclusion: Enjoy Your Custom-Made Bolster Pillow
With this comprehensive tutorial, anyone can create a beautiful, personalized bolster pillow that reflects their style and serves their everyday comfort needs. From careful planning and measuring to advanced touches like piping, tufting, and embellishing, every step transforms a simple fabric into a lasting piece of decor. Happy sewing!
References
- https://www.youtube.com/watch?v=rHrswuubWR0
- https://restyle-studio.com/en/sewing-and-fabrics/sew-a-bolster-pillow-with-decorative-stitching-in-10-steps/
- https://www.youtube.com/watch?v=xSiqyf4lenA
- https://abeautifulmess.com/how-to-make-a-bolster-pillow/
- https://mellysews.com/how-to-sew-a-bolster-pillow/
- https://www.selvedge.org/products/how-to-make-a-bolster-cushion
- https://puffy.com/blogs/best-sleep/how-to-make-a-bolster-pillow
- https://www.onlinefabricstore.com/makersmill/how-to-make-a-bolster-pillow/
- https://www.sailrite.com/How-to-Make-Bolster-Pillows


