How to Bake Mini Cakes Using a Sheet Pan
Create adorable, individual mini cakes using a basic sheet pan and everyday kitchen tools—no special molds required.
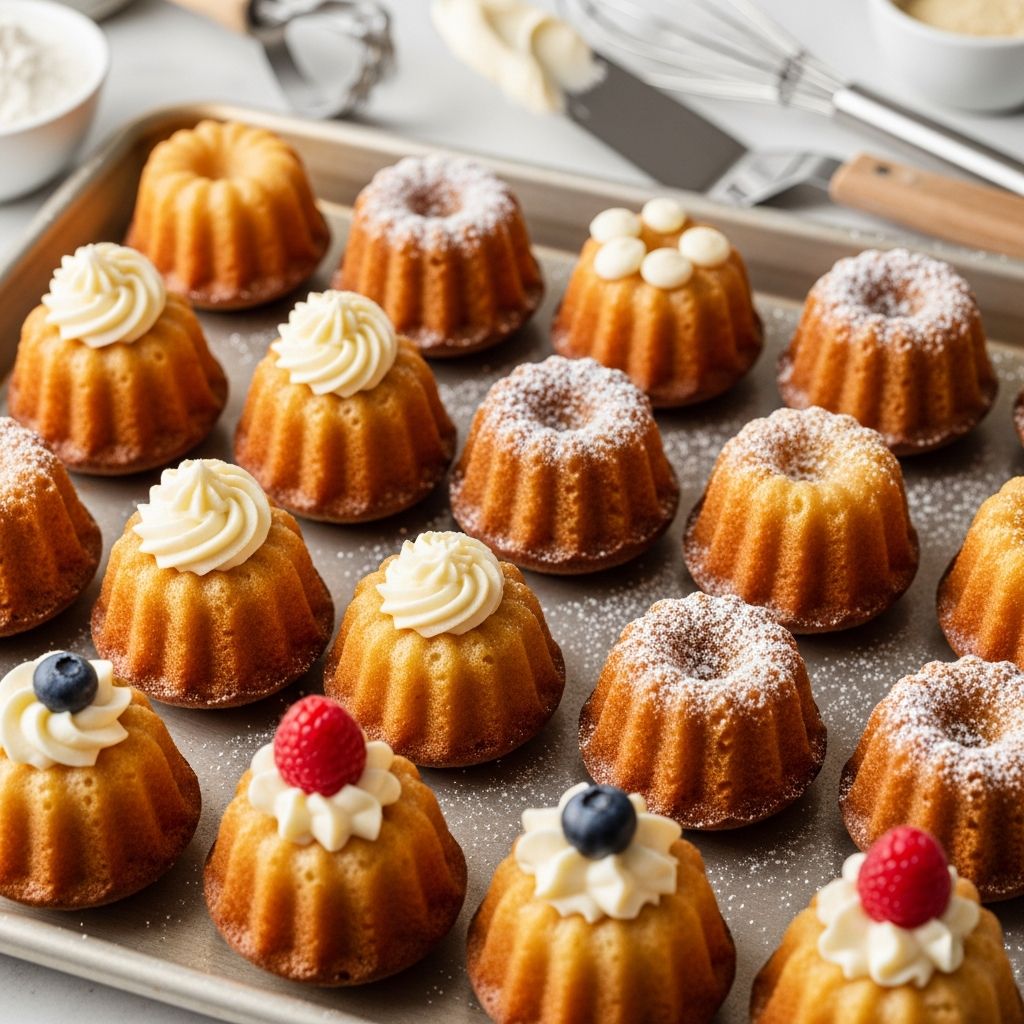
How to Bake Mini Cakes in a Sheet Pan
If you love the idea of serving charming, single-serving desserts at your events but don’t want to invest in new pans or molds, baking mini cakes in a sheet pan is the perfect solution. This method transforms a simple sheet cake into a collection of tiny layered cakes, each ready to be customized, decorated, and enjoyed.
Why Make Mini Cakes?
Mini cakes are a delightful party treat offering:
- Individual servings for guests—no slicing or portioning required.
- Endless customizations in flavor, filling, and decoration.
- Easy, approachable assembly using kitchen tools you already own.
- Safer and more practical for bigger gatherings compared to traditional whole cakes.
- Fun creative opportunities for decorating, including colorful buttercream, drizzles, fresh flowers, and more.
Overview: The Sheet Pan Mini Cake Process
The process consists of four main phases:
- Bake a thin cake layer in a sheet pan (typically a half sheet pan, 18 x 13 inches, lined with parchment).
- Cut out mini cake rounds using a biscuit cutter, empty tin can, or similar tool.
- Stack and fill the mini cakes with your favorite creams, jams, or buttercreams.
- Decorate creatively with frostings, drizzles, sprinkles, fruit, or edible flowers.
This tutorial will cover each step in detail, plus provide tips, decorating ideas, and answers to common questions for an approachable and rewarding baking experience.
Tools & Equipment Needed
- Half sheet pan (18 x 13 inches preferred for optimal yield)
- Parchment paper for lining
- Round biscuit cutter (2-3 inch diameter works best), or a clean empty can with both ends removed, or a small glass
- Mixing bowls and spatula
- Wire cooling rack
- Offset spatula or knife for frosting
- Piping bags (optional, for filling and decoration)
Step 1: Baking the Cake Base
Choosing a Cake Recipe
You can use almost any cake batter for this technique. Classic choices include vanilla, chocolate, or funfetti—whatever fits your celebration theme. The cake should be sturdy enough to hold its shape when cut and stacked, and not overly delicate or crumbly. Consider these guidelines:
- Cake Height: Aim for 1/2 to 1 inch thick after baking. This allows you to cut and layer without crumbling.
- Pan Prep: Thoroughly grease and line the sheet pan with parchment for easy removal.
Baking Instructions
- Preheat your oven to 350°F (175°C).
- Prepare the batter according to your recipe. Bake in a lined half sheet pan, smoothing the top to an even thickness.
- Bake until a toothpick inserted into the center comes out clean. Baking time is usually less than for traditional cakes—between 15 to 20 minutes—since the layer is thinner.
- Let the cake cool completely in the pan on a wire rack before proceeding (this prevents tearing when cutting).
Step 2: Cutting the Mini Cake Layers
Once your sheet cake is cooled, move it to a flat, clean surface. Use your chosen round cutter (2 inches is ideal for most occasions) and press firmly through the cake, then twist and lift:
- Press all the way through the cake to the bottom of the pan for a clean cut.
- Twist gently and lift straight up to remove each round.
- Repeat, cutting as many rounds as you can fit from the sheet. Reserve scraps—you can use them for cake pops, trifles, or taste-testing!
- For ease, refrigerate the cake briefly to help it firm up if it’s too soft to cut cleanly.
Yield & Sizing
With a half sheet pan and a 2-inch cutter, you can typically yield 12–18 double-layer or triple-layer mini cakes. The precise number depends on your cutter size and desired cake height.
Step 3: Filling and Assembling Mini Cakes
Time for the fun part: stacking and sandwiching the layers! Here’s how:
- Sort cake rounds into uniform sizes for even layering.
- Prepare your fillings (classic buttercream, whipped cream, chocolate ganache, or jam).
- If using loose fillings (such as jam or curd), pipe a ring of buttercream around the layer’s edge to contain it before adding the filling.
- Place one cake round down, spread a dollop of your desired filling, then top with another round (repeat for a third layer if you prefer taller cakes).
- Press gently to secure the layers, then continue assembling each mini cake.
Tips for Stacking
- For best structure, chill the cake rounds before assembling. This minimizes crumbling and makes handling easier.
- Plan for a little extra filling or frosting for the top and sides if you want a classic covered look.
Step 4: Decorating Mini Cakes
Mini cakes are the perfect canvas for creative decoration. Here are some ideas and techniques to try:
- Classic Buttercream: Use vanilla or chocolate buttercream, spread smoothly with an offset spatula or piped in rosettes.
- Jam or Fruit Layer: Add fruit preserves or curd between layers and top with a dollop for color and flavor.
- Chocolate Drizzle: Pour melted chocolate or ganache on top for a dramatic drip effect.
- Fresh Flowers: Top each mini cake with an edible flower for elegance.
- Sprinkles, nuts, or crumbled cookies: Add texture and visual flair.
- Personalized Toppers: Use small paper flags, bridal shower picks, or themed decorations for special occasions.
- Colorful Frosting: Tint buttercream in pastel or bold colors for gender reveals or festive events.
Decorating Techniques Table
| Decoration Style | Tools Needed | Best For |
|---|---|---|
| Buttercream Rosettes | Piping bag, star tip | Weddings, showers |
| Chocolate Drip | Spoon, melted chocolate | Birthday, celebration |
| Fresh Flowers | Edible blooms, tweezers | Spring parties |
| Sprinkles & Nuts | Bowl, hands | Kids’ parties, fun events |
Ideas for Special Occasions
- Bridal Showers: Use pastel buttercream, add edible pearls or monogrammed toppers.
- Birthday Parties: Frost in the guest of honor’s favorite colors, decorate with sprinkles and candles.
- Gender Reveal: Fill cakes with pink or blue frosting; cut open for a surprise reveal.
- Holiday Gatherings: Add spiced cake layers, decorate with seasonal fruits or themed toppers.
Pro Tips for Perfect Mini Cakes
- Practice makes perfect! Use a couple of cake rounds for testing decorations before finishing your display cakes.
- Chill your cakes before assembly to avoid crumbling and make frosting easier.
- Gather your tools in advance for a smooth workflow.
- Don’t waste scraps—repurpose them for cake pops, parfaits, or snacks.
- Personalize for guests by writing names or messages using piping gel or chocolate.
Frequently Asked Questions (FAQs)
Q: What type of cake works best for sheet pan mini cakes?
A: Sturdy cakes like classic yellow, vanilla, or chocolate are ideal. Avoid overly crumbly or delicate batters, as they can fall apart during cutting and assembly.
Q: How can I cut out mini cake rounds if I don’t have a biscuit cutter?
A: Use a clean empty can with both ends removed, a small drinking glass, or trace a circle using a paring knife around a small plate or cup.
Q: Do I need to level the cake after baking?
A: Usually not, as sheet cakes baked in thin layers are already flat. If you notice significant doming, shave off the top gently with a serrated knife before cutting circles.
Q: What’s the best way to store mini cakes?
A: Mini cakes can be stored in the refrigerator, lightly covered, for 2–3 days. For best flavor and texture, bring to room temperature before serving.
Q: Can I make mini cakes in advance?
A: Yes! Bake and cut the cake rounds up to a day ahead and store (unfilled) in an airtight container. Assemble and decorate just before serving for freshest results.
Mini Cake Inspiration Gallery
- Vanilla cake with strawberry jam filling, topped with piped buttercream and fresh berries
- Chocolate cake with ganache drizzle and a sprinkle of sea salt
- Lemon cake with blueberry compote and lemon zest swirl
- Funfetti cakes with pastel buttercream and rainbow sprinkles
- Almond cake with raspberry filling and sugared petals
Key Takeaways
- Baking mini cakes from a sheet pan offers maximum versatility with minimal equipment.
- This technique is perfect for parties, showers, or whenever you want to serve something small, sweet, and special.
- Creativity in decoration turns these mini desserts into edible art!
Ready to Try?
Whether you’re celebrating a special occasion or simply want to brighten someone’s day, mini cakes from a sheet pan are sure to impress. Experiment with your favorite flavors, fillings, and designs, and enjoy the process as much as the results!


